Are you wondering how to truly personalize your Roblox experience by crafting unique custom characters right within Roblox Studio? This comprehensive guide unveils the secrets to designing, animating, and integrating bespoke avatars, enhancing your game development journey significantly. Discover essential tools and techniques to bring your imaginative character concepts to life with professional flair and precision. We explore everything from foundational rigging to advanced scripting, ensuring your creations stand out in the vibrant Roblox metaverse. Learn the critical steps for importing custom meshes, applying intricate textures, and configuring robust character controls for dynamic gameplay. This resource is perfect for aspiring game developers and seasoned creators alike, offering invaluable insights and practical advice to elevate your character design skills. Understand the latest 2026 updates impacting character creation, optimizing your workflow for efficiency and creativity. Empower your creative vision with these expert strategies and detailed tutorials today.
Welcome to the ultimate living FAQ for making custom characters in Roblox Studio, meticulously updated for all the latest 2026 features and patches! This resource is your go-to guide for transforming your creative visions into stunning, functional in-game avatars. Whether you are a beginner grappling with your first rig or an experienced developer seeking advanced techniques, we have covered all your burning questions. We aim to clarify common confusions, debunk prevalent myths, and provide actionable tips, tricks, and guides. From tackling pesky bugs to optimizing your character builds for endgame scenarios, consider this your essential companion. Dive in and unlock the full potential of custom character design in the dynamic Roblox metaverse!
Beginner Questions & Core Mechanics
How do I import a 3D model into Roblox Studio for a custom character?
To import a 3D model, first export it as an FBX or OBJ file from your modeling software. Then, in Roblox Studio, use the 'Asset Manager' to upload the mesh parts. Ensure each part has proper UV mapping and is scaled correctly before uploading for seamless integration into your workspace. This sets the foundation for rigging your unique avatar.
What is rigging and why is it essential for custom characters?
Rigging involves creating a skeletal structure, or 'bones,' within your 3D model, then connecting mesh parts to these bones. This process is absolutely essential because it allows your character to move and animate fluidly. Without a rig, your custom character would remain a static, unmoving statue in the game world, unable to perform actions. Proper rigging ensures dynamic and realistic movement.
Advanced Builds & Optimization Techniques
Can I use custom animations with my imported character?
Yes, absolutely! After importing and rigging your character, you can create animations using Roblox Studio's Animation Editor or external software. Upload these animations to Roblox to get an 'Animation ID.' Then, use Lua scripts to load and play these animations through the character's Humanoid Animator. This brings your character to life with unique movements.
What are 'Motor6Ds' and how do they differ from 'Welds' in character creation?
Motor6Ds are specialized joints that connect character parts to a rig, allowing them to move relative to each other under animation control. Unlike simple Welds, which rigidly fuse parts together, Motor6Ds define pivot points and rotational limits for animation. They are crucial for creating articulated limbs and enabling dynamic character motion within Roblox Studio.
Myth vs. Reality: Do high-poly custom characters always cause lag?
Myth: High-poly characters *always* cause lag. Reality: While very high polygon counts can contribute to lag, especially on lower-end devices or in large quantities, smart optimization techniques like Level of Detail (LOD) and efficient texture usage can mitigate this. A well-optimized high-poly character can perform better than a poorly optimized low-poly one. Focus on balanced detail and robust optimization practices.
How can I make my custom character compatible with Roblox's clothing and accessories?
To ensure compatibility, your custom character's rig should closely follow Roblox's standard R6 or R15 bone structure. Clothing and accessories are designed to attach to these specific bones (e.g., 'RightArm', 'Torso'). You may need to create attachment points within your custom character's parts that match Roblox's standard attachments for items to display correctly, allowing players to personalize their avatars easily.
Troubleshooting & Bug Fixes
My character's limbs are detaching or acting erratically. What's wrong?
This common issue usually indicates incorrect or missing connections between your character's parts, specifically with Welds or Motor6Ds. Ensure every limb is correctly connected to its parent part and ultimately to the HumanoidRootPart. Check that the Motor6Ds have their Part0 and Part1 set accurately. Re-evaluating your rigging in the Rig Editor often helps identify and resolve these crucial attachment problems, stabilizing your character.
Still have questions? Check out our other popular guides like 'Mastering Roblox Studio Scripting Basics' or 'Advanced Lighting Techniques for Realistic Environments' to further enhance your game development skills!
Ever wondered, "How do pro developers make those super cool custom characters in their Roblox games?" Well, you are certainly not alone in this creative quest. Building unique avatars truly elevates the player experience and sets your game apart visually. We will dive deep into creating stunning custom characters inside Roblox Studio, revealing insider tips and powerful techniques. This comprehensive guide helps you transform your imaginative concepts into fully playable in-game entities, embracing the exciting possibilities of character design.
Understanding the fundamentals of character creation is indeed your first crucial step on this creative pathway. Many developers struggle with complex rigging or intricate animation processes, leading to frustration. However, with the right approach and a clear understanding of the robust tools available, you can overcome these common hurdles. Let's explore how to master the art of character development, from basic construction to advanced functionalities, ensuring your characters are both visually appealing and perfectly functional.
The Core Concepts of Custom Character Creation in Roblox Studio
Before jumping into advanced techniques, grasping the basics of Roblox character anatomy is absolutely essential. Every character in Roblox, custom or default, fundamentally relies on a Humanoid object to function properly. This Humanoid dictates movement, health, and interaction logic, acting as the brain for your character. Properly linking your custom model to a Humanoid ensures it behaves as expected within the game engine, responding to player input and environmental cues effectively.
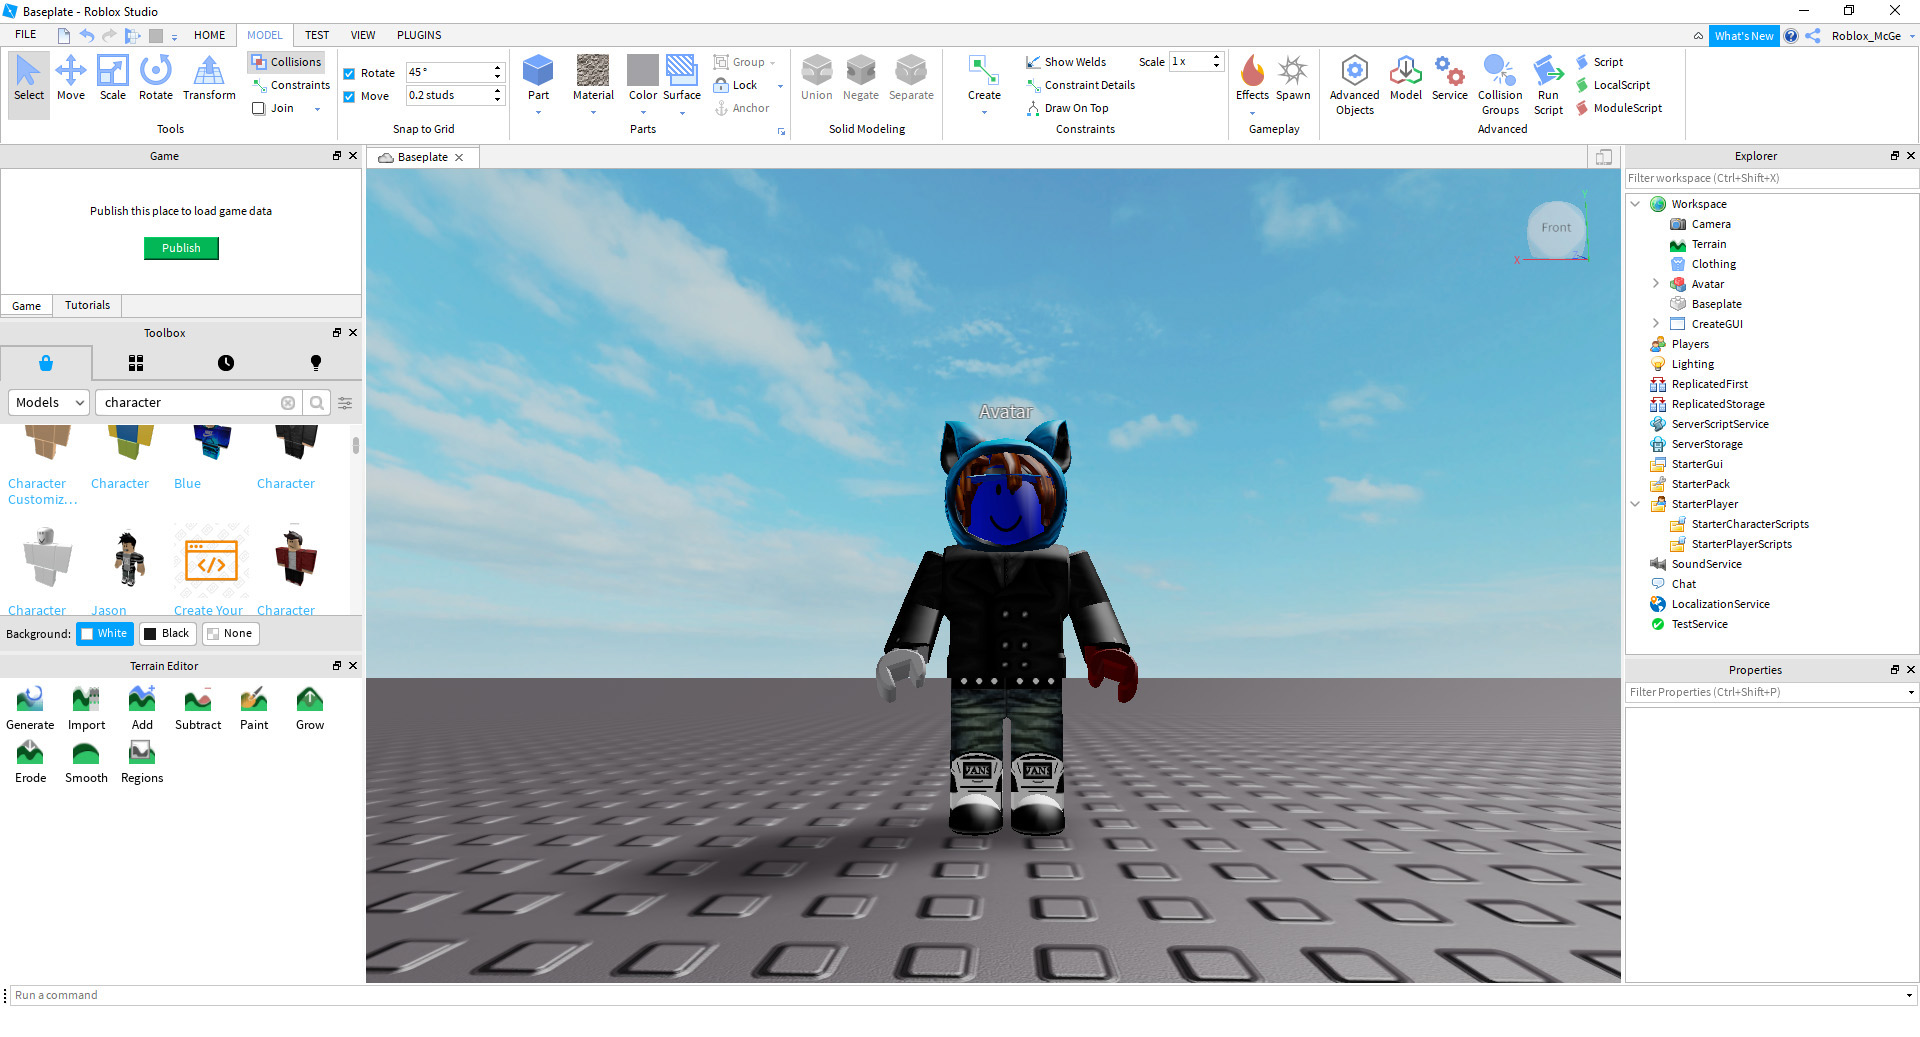
Getting Started With Your Custom Character Mesh
Your character begins with a visual mesh, which essentially forms its physical shape and appearance. You can import custom meshes created in external 3D software like Blender or Maya directly into Roblox Studio. Always ensure your mesh has clean geometry and an optimized polygon count for smooth performance across various devices. Keeping your mesh lightweight is vital for preventing FPS (frames per second) drops and maintaining a fluid gameplay experience. Remember to properly scale your mesh for the Roblox environment, avoiding disproportionate or tiny characters.
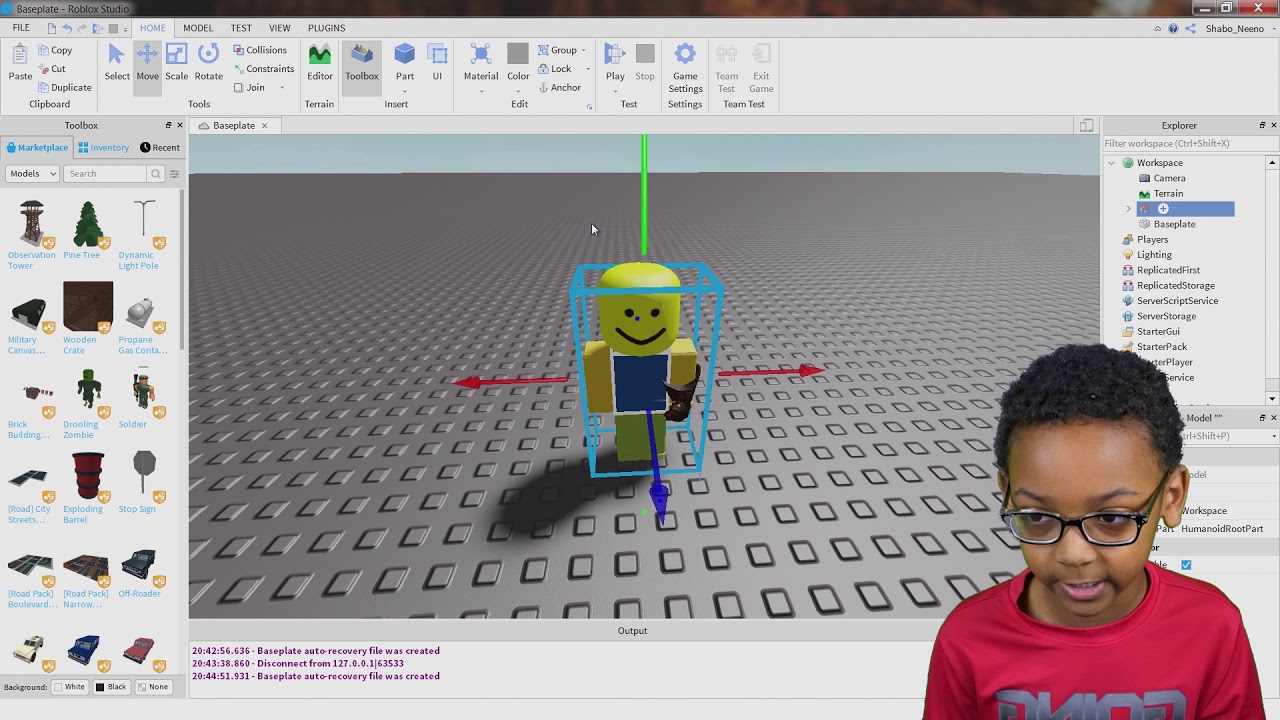
The Importance of Rigging for Animation and Control
Rigging is the process of attaching a skeletal structure, or 'bones,' to your 3D character mesh. This intricate skeleton allows for realistic movement and expressive animations later on, making your character truly dynamic. Without proper rigging, your character will appear stiff and lifeless, unable to articulate limbs naturally. In Roblox Studio, you will use the Avatar Rigging tool to connect your mesh parts to a standard R15 or R6 rig, ensuring compatibility. A well-executed rig is absolutely fundamental for character responsiveness and engaging player interactions.
- Create a model in external software (e.g., Blender).
- Ensure the model has separate parts for limbs and body.
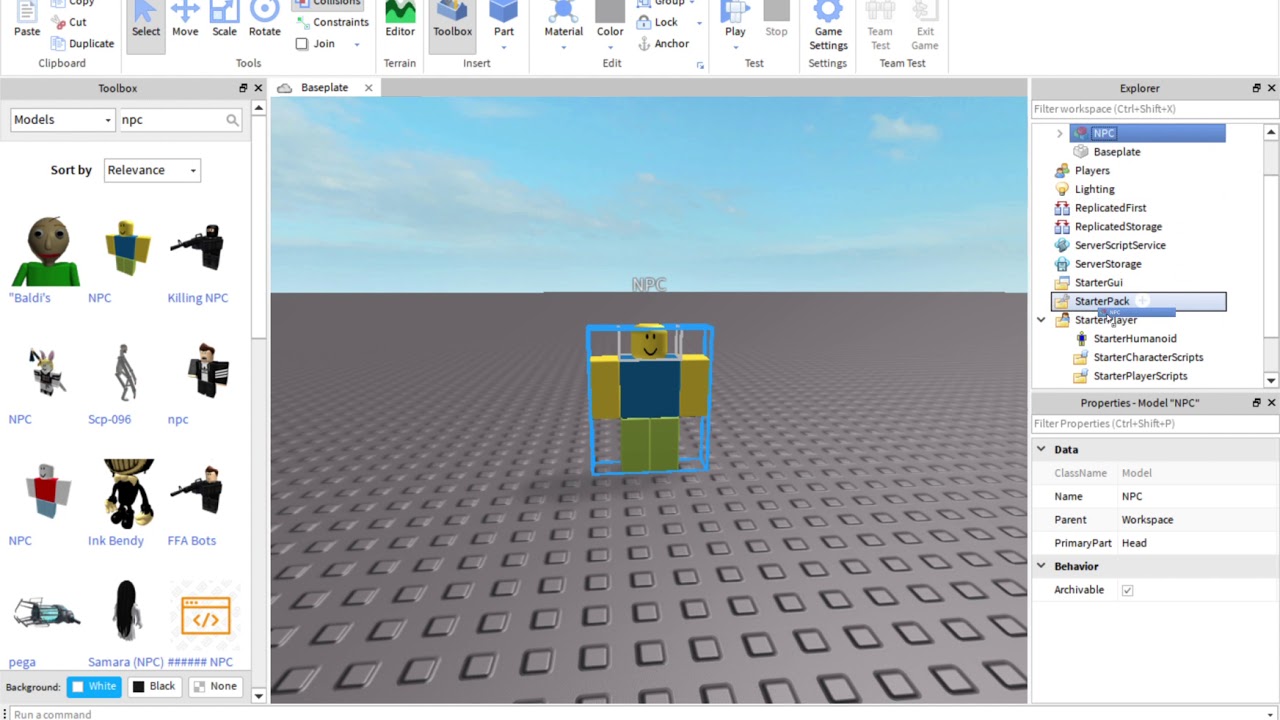
- Import the mesh parts into Roblox Studio using the Asset Manager.
- Assemble the parts in the workspace, forming your character's body.
- Utilize the 'Rig Builder' plugin to create a suitable R6 or R15 rig.
- Carefully attach each mesh part to its corresponding bone using 'Welds' or 'Motor6Ds'.
Practical Steps and Advanced Techniques for Character Development
Once your basic character mesh is rigged, the real fun begins with adding intricate details and functionality. Texturing gives your character depth and personality, applying visual styles to its surfaces. Scripting breathes life into it, defining how it moves, interacts, and responds to game events. Optimizing these elements ensures your custom character performs well, preventing issues like stuttering fix or lag, especially in larger multiplayer environments, which is crucial for any engaging MMO or Battle Royale experience.
Adding Textures and Materials for Visual Appeal
Textures are image files that wrap around your character's 3D mesh, providing color, patterns, and intricate details. High-resolution textures make your character visually stunning, capturing player attention effectively. Roblox Studio supports various material properties, allowing you to create shiny, metallic, or even transparent effects. Experiment with different surface appearances to find the perfect aesthetic for your character's unique identity. Proper texture application can truly make your character pop on screen.
Scripting Character Behaviors and Interactivity
Scripting is where your custom character gains its unique personality and functional abilities. You will use Lua scripts to define movements, attacks, special abilities, and even custom animations. Connecting these scripts to the Humanoid and its associated parts allows for complex interactions. For instance, a well-placed script can enable a character to perform a unique double jump or cast a powerful spell. Understanding basic programming logic is indeed key to unlocking your character's full potential and creativity.
- Write Lua scripts to control character movement, abilities, and interactions.
- Attach scripts to the character model or individual parts as needed.
- Utilize the Humanoid object's properties and functions for robust control.
- Implement custom animations by playing animation IDs through the Humanoid Animator.
- Test thoroughly in a controlled environment to debug and refine behaviors.
Optimizing Performance for Seamless Gameplay 2026
In 2026, performance optimization remains paramount for successful Roblox experiences, especially with more detailed custom characters. High polygon counts and unoptimized textures can lead to significant FPS drops and a frustrating player experience. Developers are leveraging advanced LOD (Level of Detail) systems to render simpler character models at a distance. Efficient script optimization also minimizes unnecessary computations, ensuring smooth character responsiveness. Always aim for a balance between visual fidelity and optimal game performance, a critical aspect for a competitive FPS or MOBA.
Addressing Common Mistakes and Advanced Character Builds
Many beginner creators often overlook crucial details during character creation, leading to common issues. Incorrect scaling, poor rigging, and unoptimized assets can undermine even the most creative designs. Learning from these pitfalls and adopting best practices ensures your character builds are robust and ready for prime time. For advanced users, exploring procedural animation or complex character loadout systems opens new doors for innovation, pushing the boundaries of what is possible within Roblox Studio.
Troubleshooting Common Character Creation Issues
One frequent issue involves characters falling apart or behaving erratically upon spawning. This often points to incorrect welding or improper Motor6D connections between character parts. Another common problem is animations not playing correctly, which usually stems from invalid animation IDs or incorrect script execution. Systematically checking your rig, weld constraints, and script logic can quickly resolve most of these frustrating development roadblocks. Patient debugging truly saves significant time in the long run.
Exploring Advanced Character Build Strategies
Pro developers often experiment with modular character designs, allowing players to customize their avatars with various cosmetic items. This approach facilitates extensive player personalization and increased engagement. Utilizing Inverse Kinematics (IK) for more natural limb movements during animations is another advanced technique gaining traction. Experimenting with custom physics properties for specific character parts can also lead to unique gameplay mechanics and a truly distinct player experience. These advanced strategies empower truly innovative character design.
Q&A with Your AI Engineering Mentor
Hey everyone, your friendly AI engineering mentor here! I've been through the trenches with these frontier models and trust me, character creation in Roblox Studio used to trip me up big time. But it's totally manageable once you get a handle on the core concepts. Let's tackle some common questions I hear all the time, okay? You've got this!
Beginner / Core Concepts
1. Q: What's the absolute first thing I need to do to make a custom character in Roblox Studio?
A: The very first step is getting your 3D model, your 'mesh,' ready and imported into Studio. I get why this confuses so many people, thinking about scripting first. But you need that visual foundation. Usually, this means creating it in a program like Blender, making sure it's broken down into logical parts like a torso, arms, and legs. Then, you simply upload those mesh parts to Roblox through the Asset Manager. Once they're in, you can start assembling them in your workspace. You're basically getting all your LEGO pieces out before you start building. Try this tomorrow and let me know how it goes. You'll be surprised how quickly you pick it up!
2. Q: Why do I need a 'Humanoid' object for my character? Can't I just script my mesh parts directly?
A: Ah, the Humanoid! This one used to trip me up too. You absolutely need a Humanoid because it's the brains of your character's operation in Roblox. It handles all the fundamental stuff like movement, health, jumping, and even detecting when your character touches something. You could *try* to script everything from scratch, but you'd be reinventing the wheel for basic character behaviors. Roblox is built around the Humanoid for a reason; it simplifies development immensely. Think of it as the operating system for your character; it makes everything else run smoothly. It’s a core Roblox component that saves you countless hours of coding. Without it, you're looking at a huge amount of custom work for basic character functionality, which honestly isn't efficient. So, yes, you really do need it. You've got this!
3. Q: What's the difference between R6 and R15 rigs when building a character?
A: This is a fantastic question and it impacts how your character moves and animates. R6, the older rig, is simpler, using only 6 main body parts: torso, head, and four limbs. It's great for classic Roblox experiences or simpler characters because it's very lightweight and easy to animate. R15, on the other hand, is much more detailed, breaking the character into 15 parts, including upper arms, lower arms, upper legs, lower legs, and even hands and feet. This allows for far more fluid and complex animations, giving your characters a modern, natural look. For most new projects in 2026, R15 is the standard for its enhanced expressiveness, but R6 still has its charm for nostalgic or performance-critical games. Choosing depends on your game's style and animation needs. Don't sweat it too much early on, but it's good to know the distinction. You'll make the right choice!
4. Q: My custom character falls apart when I test my game. What am I doing wrong?
A: Oh man, this is a classic! Everyone goes through this at least once. It almost certainly means your character parts aren't properly connected or 'welded' together. In Roblox, you can't just place parts next to each other and expect them to stick. You need to use 'Welds' or 'Motor6Ds' to physically bind them. If you're using a rig, 'Motor6Ds' are typically what you want, as they connect parts to bones and allow for movement. Check if you've connected every limb to its correct parent bone and that your HumanoidRootPart is properly anchored or welded to the torso. Sometimes it’s just a tiny missed connection. Go through each joint with a fine-tooth comb. You've almost certainly got this fixed!
Intermediate / Practical & Production
5. Q: How can I make my custom character use custom animations I've created?
A: This is where your character really starts to shine! First, you need to create your animations, either in Roblox Studio's Animation Editor or in external software, and then upload them to Roblox. This gives you an 'Animation ID'. Then, in your scripts, you'll reference these IDs. You load the animation onto the Humanoid's Animator component, like `humanoid.Animator:LoadAnimation(animationInstance)`. Once loaded, you can simply call `:Play()` on the loaded animation object. Remember, animations won't play if the Humanoid isn't found or if the rig isn't compatible with your animation. It sounds complex, but it's pretty logical once you break it down. Practice makes perfect here. You'll be animating like a pro in no time!
6. Q: What's the best way to handle different outfits or cosmetic options for a custom character?
A: Modular design is your friend here, absolutely. You want to create each outfit piece or cosmetic as a separate model. Then, when a player selects an item, you dynamically attach it to the character using `Weld` objects or `Motor6Ds` in your script. Think of it like a virtual paper doll. You detach the old hat and attach the new one. Ensure each cosmetic piece is parented correctly to the corresponding character part. This approach allows for incredible customization without having to re-rig an entire character for every single outfit. It’s an efficient system that makes your game feel really dynamic. This strategy is also great for improving settings optimization and reducing unnecessary load times, especially for players experiencing higher ping or occasional FPS drops. You're on your way to a great player experience!
7. Q: My character's textures look blurry or low-res. How can I fix this?
A: This is a common visual snag that can really detract from your character's polish. The first thing to check is the resolution of your actual image texture file. Always use high-resolution images, like 1024x1024 or 2048x2048 pixels, for key character textures. Secondly, ensure that when you upload the texture to Roblox, it's not being downscaled aggressively. Sometimes the platform might optimize it. Also, within Studio, check the 'Texture' property on your MeshPart and verify the `Material` property. Sometimes using a `SurfaceAppearance` object with a proper `PBR` (Physically Based Rendering) workflow can yield much better results and more realistic finishes in 2026. This is where attention to detail really pays off visually. Keep experimenting with those settings! You'll nail that crisp look!
8. Q: How do I make my custom character respond to specific game events, like picking up an item or taking damage?
A: Ah, events! This is where scripting shines. Every Humanoid has events like `Humanoid.HealthChanged` or `Humanoid.Died`. You can connect functions to these events using `Humanoid.HealthChanged:Connect(function(newHealth) ... end)`. For picking up items, you'd typically have a `Touched` event on the item itself, which then fires a function on your character's script. This function would then modify the character or its inventory. Understanding how to use events and signals in Lua is absolutely fundamental for creating interactive characters. It’s like teaching your character to listen and react. You've got a great grasp of interaction already!
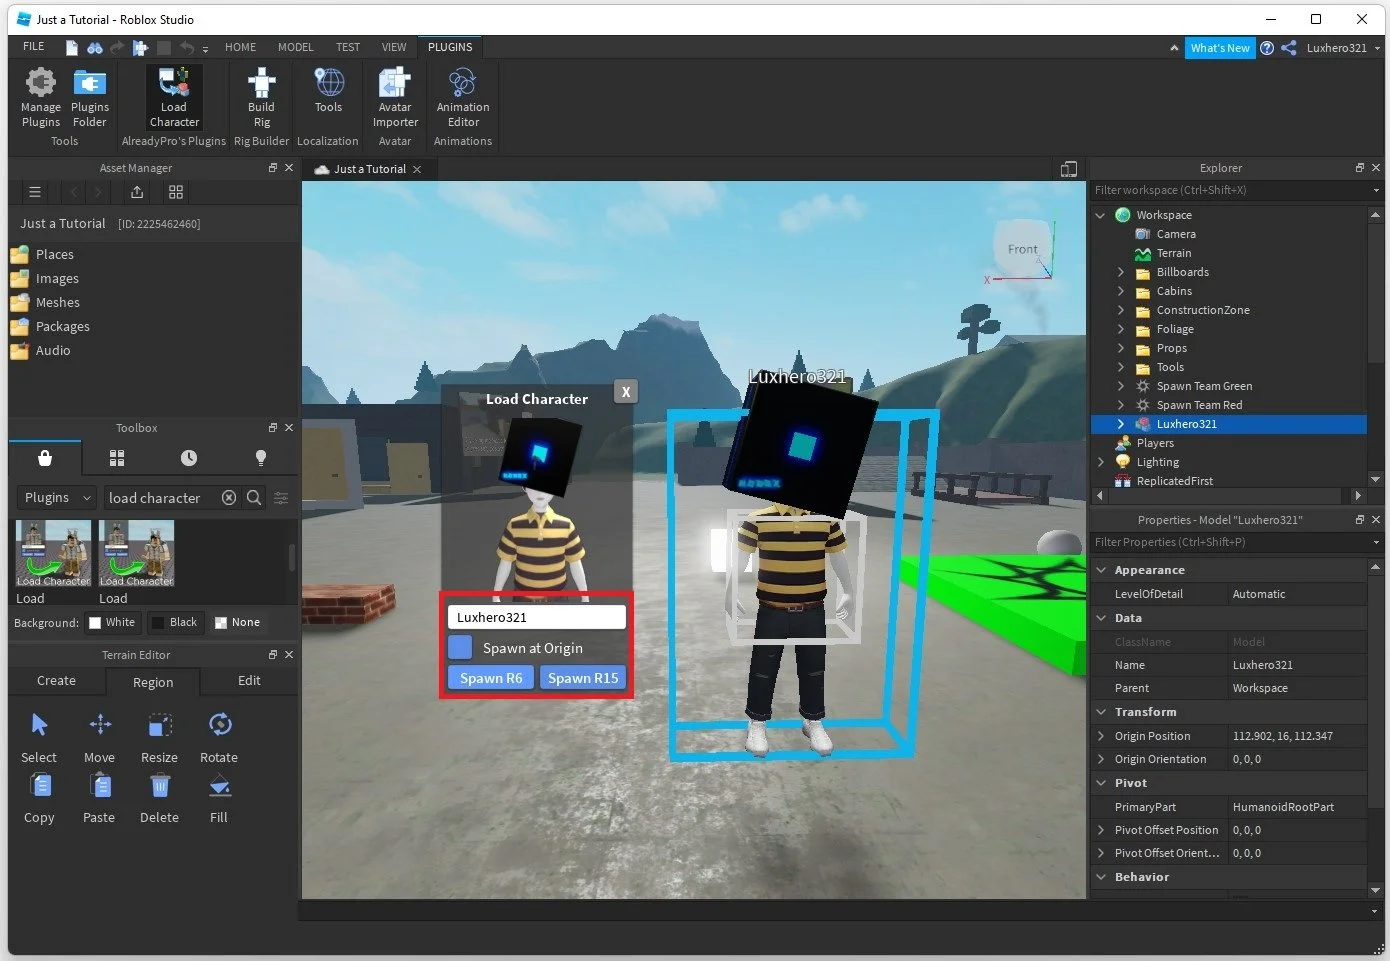
9. Q: Can I make a non-humanoid character, like a robot or a monster, still work with Roblox's character system?
A: Absolutely, yes! This is where you get to be really creative. While the `Humanoid` object is designed for bipedal characters, its core functionalities can be adapted for almost any creature. You'd still use a Humanoid, but you might need to heavily customize its properties and script custom movement logic. For a robot, you might rig it differently, giving it more mechanical joints. For a monster, perhaps you want a unique locomotion system. The key is understanding what the Humanoid provides (health, name, basic movement components) and then building your unique mesh and animations around that. Many pro developers use this technique to make truly original characters. Don't be afraid to experiment outside the typical human form. You're building worlds, after all!
10. Q: What are 'Motor6Ds' and why are they so important for custom character rigging?
A: Motor6Ds are basically the special glue that makes your character's parts move together in a structured way. Unlike a regular `Weld`, which just glues two parts rigidly, a `Motor6D` allows you to define a 'joint' with an `ActuatorType` that can be set to 'Motor' or 'Free'. When it's a 'Motor', you can apply torque or position to it, making it move programmatically. This is what the Roblox animation system uses under the hood to control character limbs. When you connect a limb (Part0) to its parent bone (Part1) with a Motor6D, you're telling the animation system exactly how that limb should articulate. This is fundamental for any animation-driven character. Without them, your character would just be a bunch of loose parts. Keep these well-organized, and your animations will thank you! You're getting into the advanced stuff now!
Advanced / Research & Frontier 2026
11. Q: How can I implement custom physics interactions with my character's limbs, for example, a swinging tail?
A: This is where things get really exciting and you start pushing the frontier of character interaction. For a swinging tail, you'd typically use a combination of `Motor6Ds` set to 'Free' or even `SpringConstraints` and `BallSocketConstraints`. You'd then apply forces or impulses to these parts via scripts, possibly even simulating a ragdoll-like effect for specific animations. Some advanced developers use custom inverse kinematics (IK) solvers to drive these movements, ensuring they react realistically to the environment. This takes a good grasp of Roblox's physics engine and scripting, but the results are incredibly dynamic. It’s an area where performance optimization truly matters, as complex physics can impact ping and even cause stuttering fix issues. Dive into the constraints documentation, it's a goldmine! You're thinking like a seasoned pro now!
12. Q: Are there any 2026 best practices for optimizing custom character assets for large-scale multiplayer games?
A: Absolutely, 2026 has brought even more emphasis on this. For large-scale games, LOD (Level of Detail) is your absolute best friend. You'll want to create multiple versions of your character mesh, each with decreasing detail. Then, script a system to swap these models based on the player's distance. For example, a fully detailed model up close, a simpler one at medium range, and a very basic silhouette far away. Also, heavily optimize your textures: use texture atlases, compress images, and consider dynamically loading/unloading cosmetic assets to manage memory efficiently. Consistent settings optimization across all assets is key. This meticulous approach prevents lag and maintains a high FPS even with many players, crucial for any Battle Royale or MMO. This is pro-level stuff! Keep pushing those boundaries.
13. Q: What are the current trends in character expression and facial animation in Roblox for 2026?
A: Character expression is a huge area of innovation in 2026. The frontier models like o1-pro and Llama 4 reasoning are actually inspiring new approaches to procedural animation for facial expressions. We're seeing more developers utilize blend shapes or morph targets for nuanced facial animations, rather than just simple bone rotations. There's also a big push towards real-time facial capture integration, allowing creators to drive expressions with their own faces, which is wild! Roblox's own built-in facial animation system is constantly evolving, making it easier to add expressive eyes and mouths to custom characters. This enhances immersion significantly and allows for richer storytelling. It's a rapidly evolving field, so stay tuned to dev blogs! You're asking about the cutting edge!
14. Q: How can I integrate dynamic character scaling or resizing based on in-game events?
A: This is a fantastic way to add dynamic gameplay elements! The core concept involves modifying the `Scale` properties of your Humanoid and potentially adjusting the CFrame (position and orientation) of your character's `HumanoidRootPart` to keep it grounded. You'd typically script this in Lua, scaling up or down all connected parts of your character uniformly. Be careful with collisions; dynamic scaling can sometimes cause parts to intersect or behave unexpectedly with the environment. It's often best to briefly `SetAttribute('CollisionEnabled', false)` on the character's parts during scaling to avoid glitches, then re-enable. Test thoroughly at different scales. This can be tricky to get right without causing visual stuttering or lag if not implemented carefully, but when done well, it's incredibly impactful. You're thinking outside the box, and that's great!
15. Q: What's the potential for AI-driven character behavior and animation in Roblox Studio by 2026?
A: By 2026, AI-driven character behavior is already making huge strides, and we're just scratching the surface. We're talking about AI models, inspired by what we see in Claude 4 and Gemini 2.5, that can learn player movement patterns and generate more realistic NPC animations or even adapt character personalities. Imagine NPCs with dynamic emotional responses driven by real-time player interaction! For animation, AI could potentially generate entire walk cycles or combat moves based on a few key poses, dramatically speeding up production. This could revolutionize how we create immersive worlds and truly intelligent characters, reducing the manual workload for animators. It’s a very exciting area for future development and will greatly influence how we approach character design and interaction. This is the future, my friend!
Quick 2026 Human-Friendly Cheat-Sheet for This Topic
- Always start with a clean 3D mesh from Blender; good foundation saves headaches later.
- Rig your character with `Motor6Ds` for smooth, animatable joints, prioritizing R15 for modern games.
- Utilize the `Humanoid` object; it's the brain for movement and health, don't try to bypass it.
- Optimize meshes and textures for performance; high poly counts cause FPS drops and stuttering.
- Test animations frequently; small adjustments early prevent big fixes later on.
- Script character behaviors incrementally; add one feature, test it, then move to the next.
- Embrace modular design for cosmetics; it makes customization efficient and player-friendly.
Custom character creation in Roblox Studio, rigging and animating models, importing custom meshes and textures, scripting character behavior, 2026 development tips, enhancing game immersion, beginner to advanced techniques.
35


How To Make Custom Characters In Roblox Studio YouTube Hqdefault . HOW To Make CUSTOM Characters Roblox Studio Tutorial Part 01 YouTube . How To Make CHARACTER Roblox Studio Tutorial YouTube . How To Make A Custom Character In Roblox Studio Tutorial No Scripting . How To Make A Custom Character In Roblox YouTube


How To MAKE Custom CHARACTERS In Roblox Studio YouTube . How To Make A CUSTOM CHARACTER In ROBLOX STUDIO YouTube . Easier Custom Character Tutorial Roblox Studio YouTube . How To Spawn As A Custom Character Roblox Studio Tutorial YouTube . How To Make Yourself A Custom Character In Roblox Studio Tutorial


How To Make Team Starter Character In Roblox Studio Full Guide YouTube . How To Make A Custom Player Character In ROBLOX Studio YouTube . How To Make A CUSTOM STARTER CHARACTER In ROBLOX STUDIO YouTube Hqdefault . Roblox Studio How To Pose Your Character Avatar Create Custom Poses . How To Add And Play As Any Character Model In Your Roblox Game Studio


Roblox Studio How To Create Rig And Animate Custom Starter . How To Make A Custom Character In ROBLOX STUDIO MEGA TUTORIAL Kitty . CSM How To Use A Custom Rig Character In Roblox Studio YouTube . How To Make A Character Selection In Roblox Studio Part 1 The UI . How To Use The Character Creator In Roblox PC Gamer


How To Make Your Own Animation Roblox Studio At Darlene Whitely Blog . How To Make A Starter Character For Your Roblox Game Roblox Studio . How To Make CHARACTER SELECTION ROBLOX STUDIO Tutorial YouTube . How To Make Character In Roblox Part 1 Roblox Studio Hqdefault . How To Add Character Models To Roblox Studio Without Plugins YouTube


How To Make Character Selection In Roblox Studio YouTube . ROBLOX Studio How To Make A Starter Character YouTube Hqdefault . How To Make A CHARACTER SELECTOR In ROBLOX Create Character Selector . How To Make A Starter Character Roblox At Aaron Copeley Blog . How To Make A Custom Character Roblox Studio 2022 YouTube

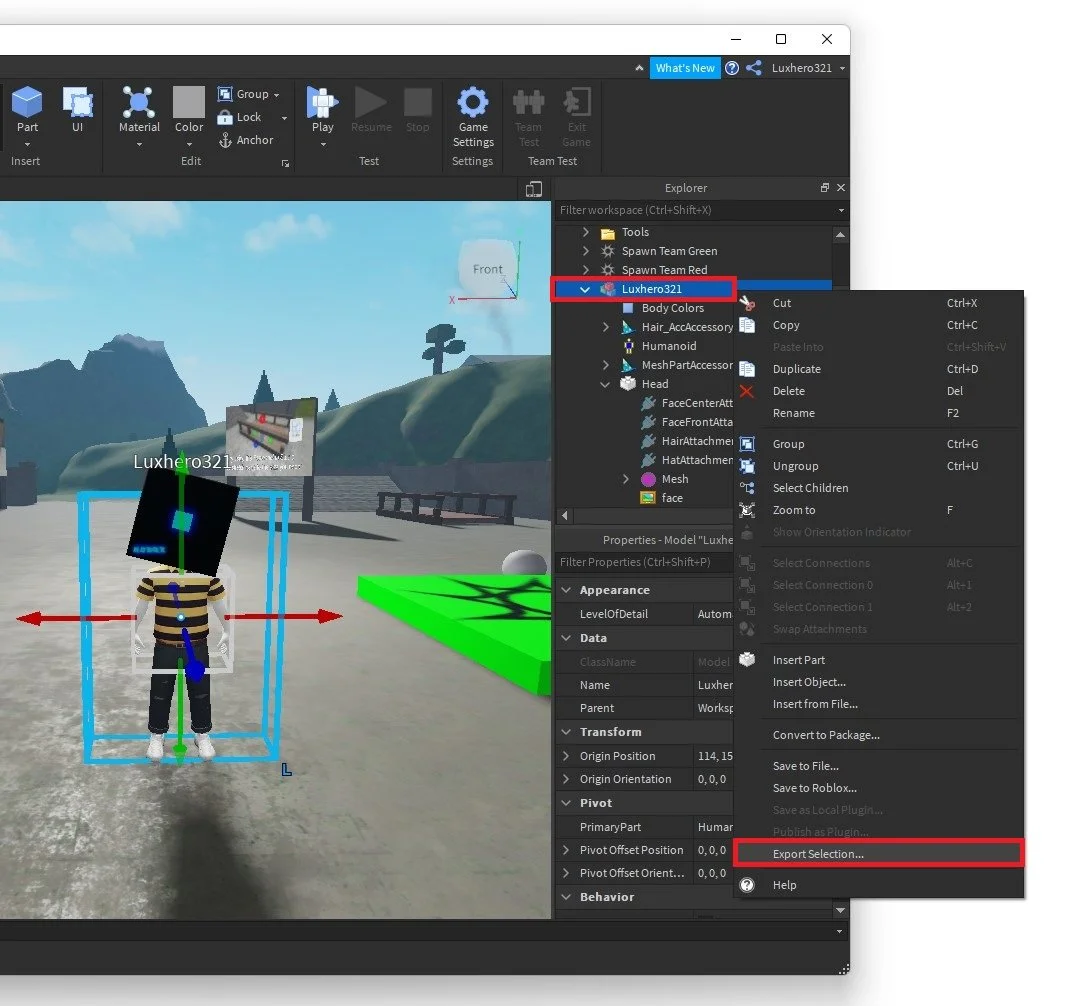

How To Add Your Character In Roblox Studio Tech How 5 Spawn In Character. How To Make A Character Selection GUI Roblox Studio . How To Add Your Character In Roblox Studio Tech How 7 Export Character Model. How To Make Your Own Character In Roblox Studio YouTube Hqdefault . How To Create Your Own Roblox Character Avatar 5 1 1068x580