Navigating the dynamic world of Roblox shirt creation requires a precise understanding of the optimal layout for engaging designs. As the platform's creator economy booms in 2026, mastering the Roblox shirt layout template is crucial for aspiring and veteran designers aiming to stand out. This comprehensive guide delves into every aspect of shirt design, from understanding the core dimensions and safe zones to leveraging advanced techniques for professional-grade apparel. We explore the latest tools, design principles, and community best practices that can elevate your virtual clothing, ensuring your creations are visually appealing, perfectly aligned, and ready to capture attention within the vibrant Roblox metaverse. Discover how to troubleshoot common issues and optimize your workflow for efficiency and creativity, transforming your ideas into sought-after digital fashion. This article provides actionable insights for anyone looking to make their mark in Roblox fashion, offering a roadmap to success in a competitive and ever-evolving digital landscape.
1. "Yo, what's the actual canvas size for a Roblox shirt? Like, pixels and stuff."2. "What are the annoying parts of the Roblox shirt template that always mess up my design?"3. "Is there a trick to make my Roblox shirt look good on literally every avatar body type, even the weird ones?"4. "What software are the pro Roblox designers using in 2026 to make those sick shirts?"5. "How do I make sure my custom shirt design doesn't get stretched or pixelated when I upload it to Roblox?"6. "Are there any new Roblox Creator Hub updates for shirt making that I should know about for 2026?"7. "What's the best way to test my Roblox shirt layout before I spend Robux to upload it?"Welcome, fellow creators and fashion enthusiasts, to the ultimate guide for mastering the Roblox shirt layout in 2026. The Roblox metaverse continues its explosive growth, and with it, the demand for unique, high-quality avatar apparel has never been higher. For seasoned PC gamers and digital artists aged 20-45, understanding the intricacies of the Roblox shirt layout isn't just about fun; it's about smart decisions, optimizing your creative output, and potentially carving out a lucrative niche in the digital fashion industry. This article will cut through the fluff, providing actionable insights to help you design professional-grade shirts that stand out, sell well, and represent your creative vision without wasting your time or Robux. We'll tackle everything from the fundamental template dimensions to advanced design techniques, ensuring your creations look fantastic on every avatar.
We know you're here for quick wins and authoritative advice, so let's dive into the most common questions and critical aspects of the Roblox shirt layout that every designer needs to know in 2026. Get ready to elevate your Roblox fashion game!
What is the standard Roblox shirt layout, and what are its dimensions?
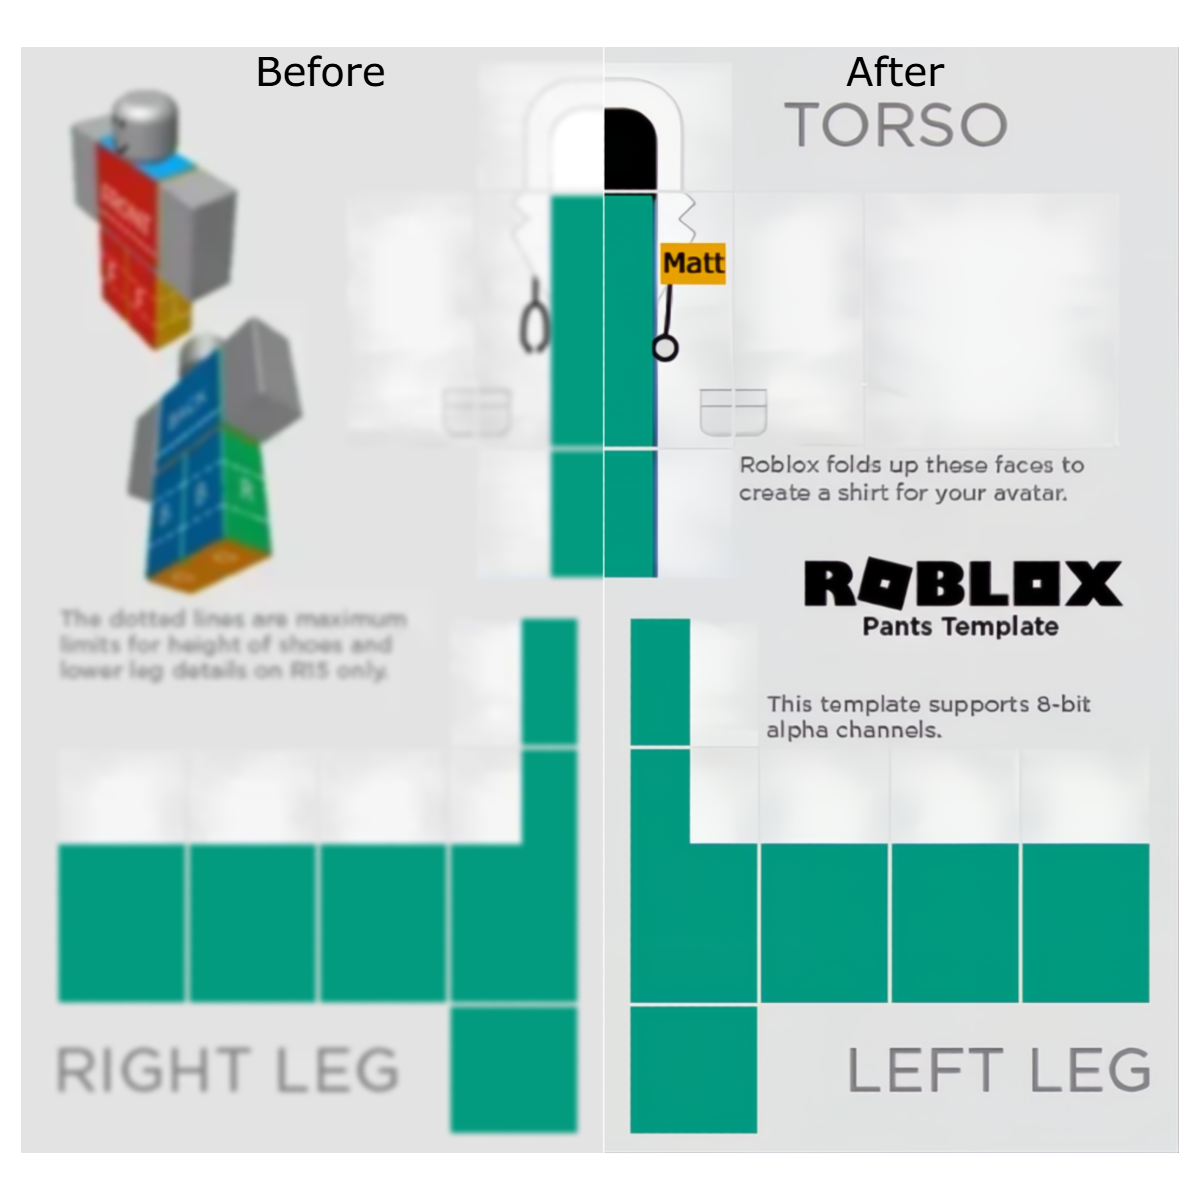
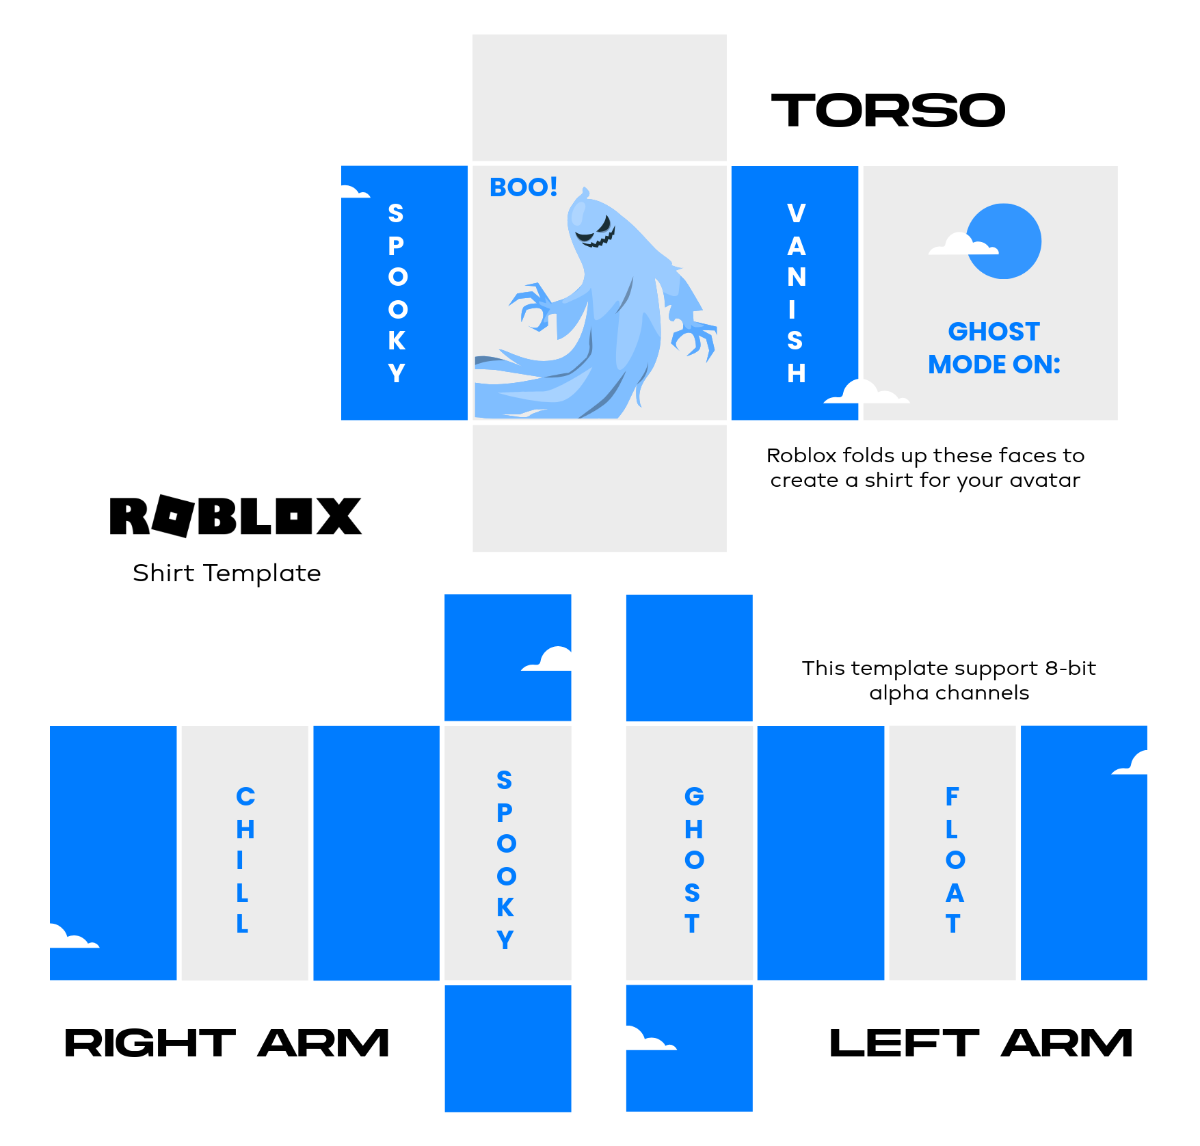
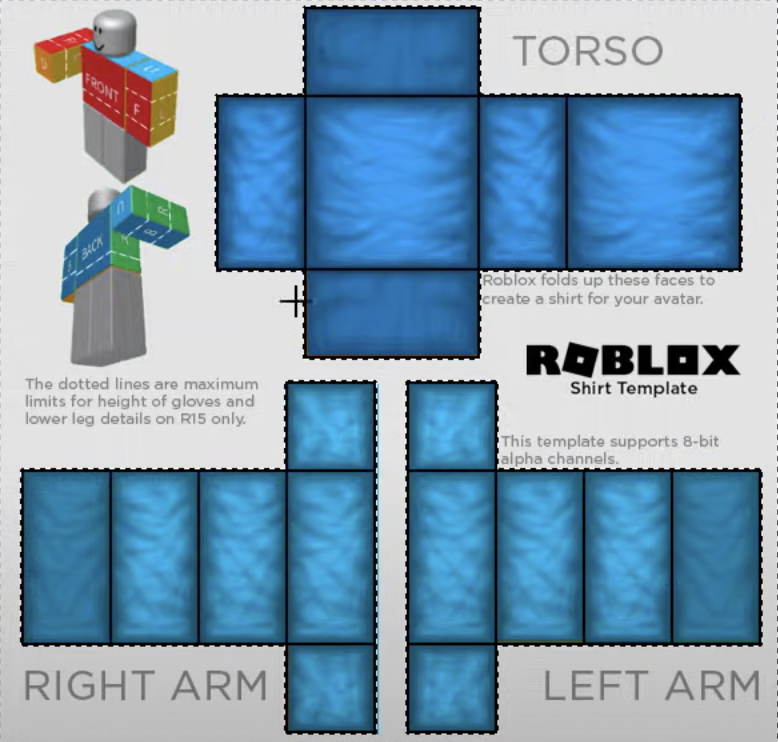
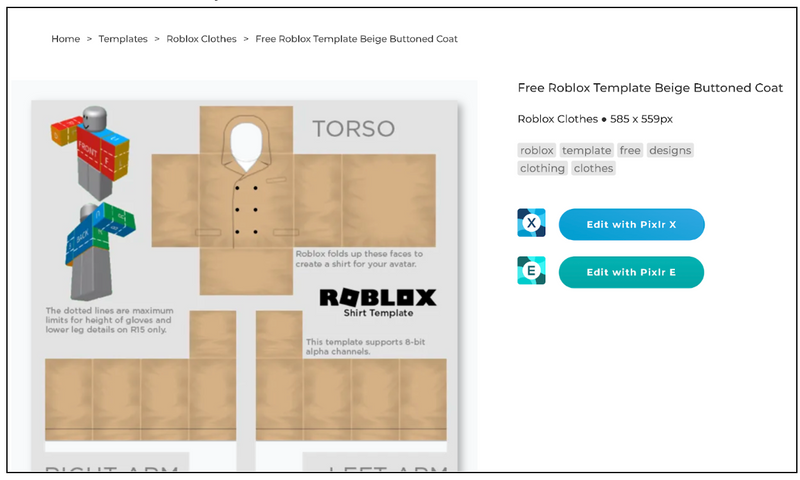
The standard Roblox shirt layout refers to a specific 2D template image that creators use to design textures for 3D avatar shirts. The official and most widely used dimension for this template is 585 pixels wide by 559 pixels tall. This template is segmented into various zones corresponding to different parts of the Roblox avatar's torso and arms: front torso, back torso, left side, right side, top of the torso, bottom of the torso, left arm, and right arm. Each section has precise coordinates, ensuring that your design wraps correctly around the 3D model. Understanding these exact pixel dimensions and the function of each segment is foundational to creating any shirt on the platform without unsightly stretching or misalignment. The 2026 Roblox platform, while advanced, still relies on this core template for consistent apparel rendering across its diverse player base.
Why is understanding the Roblox shirt layout crucial for creators in 2026?
In 2026, with the Roblox Creator Hub continually evolving and competition intensifying, a deep understanding of the shirt layout is more critical than ever. Firstly, it ensures professional quality. Incorrectly placed elements lead to distorted designs, misaligned seams, and a generally amateurish look, which repels potential buyers. Secondly, it optimizes visibility and sales; perfectly crafted shirts are more likely to be featured, recommended by the algorithm, and purchased. This translates directly to better value for your time and Robux investment. Thirdly, it future-proofs your designs; by adhering to best practices, your creations will adapt better to new avatar bodies or rendering updates. For serious creators aiming for quick wins and smart decisions in the booming Roblox economy, mastering this layout is non-negotiable for success and longevity.
How do I obtain the official Roblox shirt template for my designs?
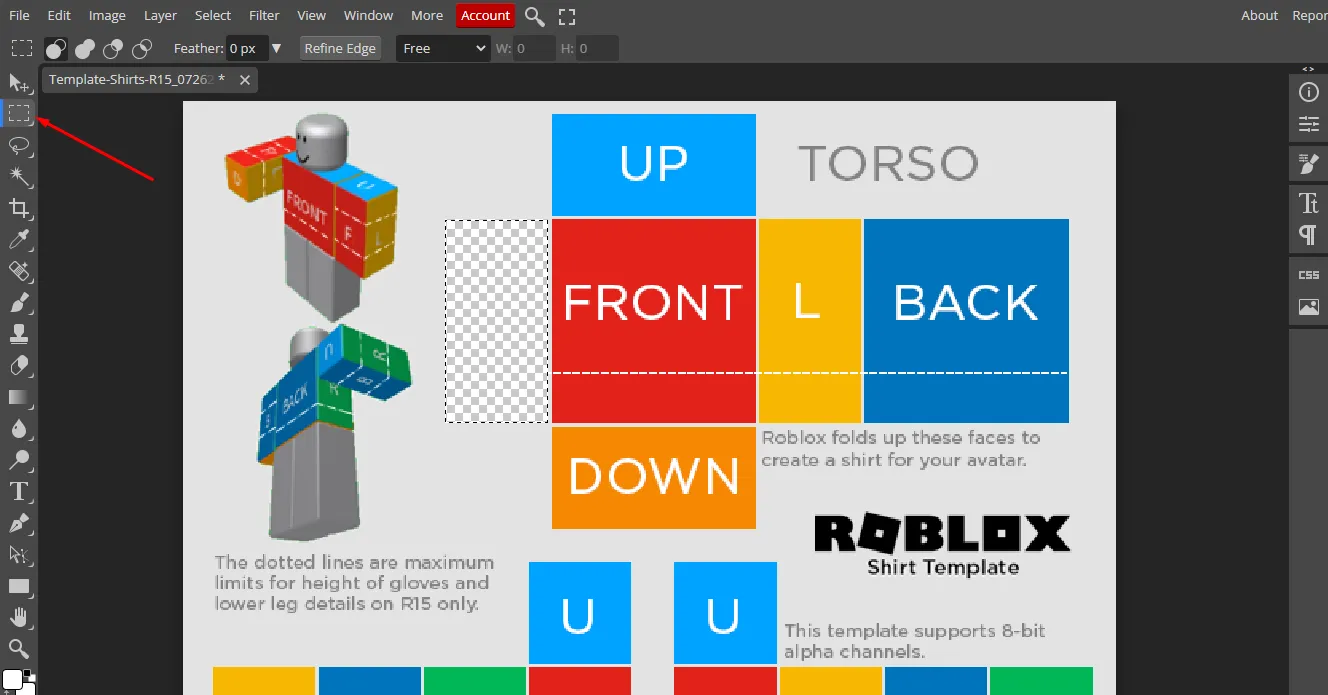
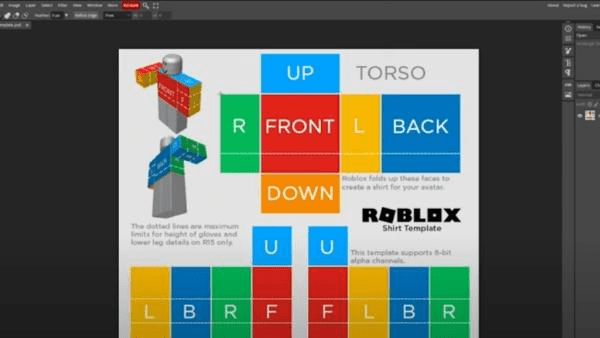
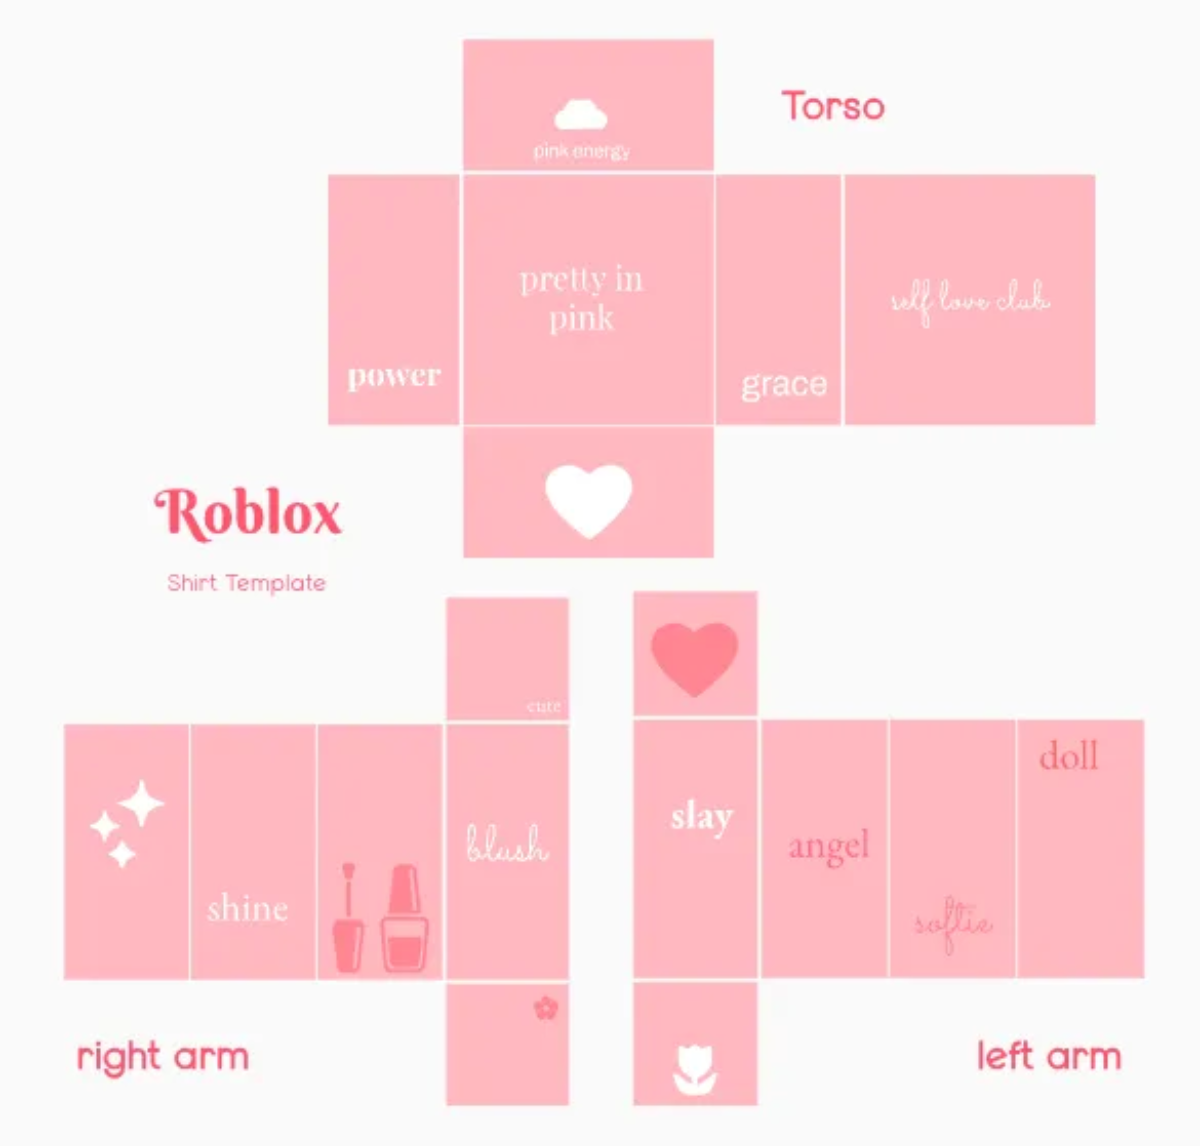
Accessing the official Roblox shirt template is straightforward and completely free. The most reliable place to get it is directly from the Roblox Creator Hub. You can usually find it within the 'Creations' section, under 'Avatar Items,' when you select the option to 'Create a new shirt.' Roblox provides a downloadable template image, typically in PNG format, which includes transparent sections and guide lines indicating where each part of the shirt (front, back, arms, etc.) should be placed. Some community resources and popular design software plugins also offer the template, but always prioritize the official source to ensure you have the most up-to-date and accurate version. Once downloaded, you can open it in your preferred image editing software, like Photoshop or GIMP, as your base layer.
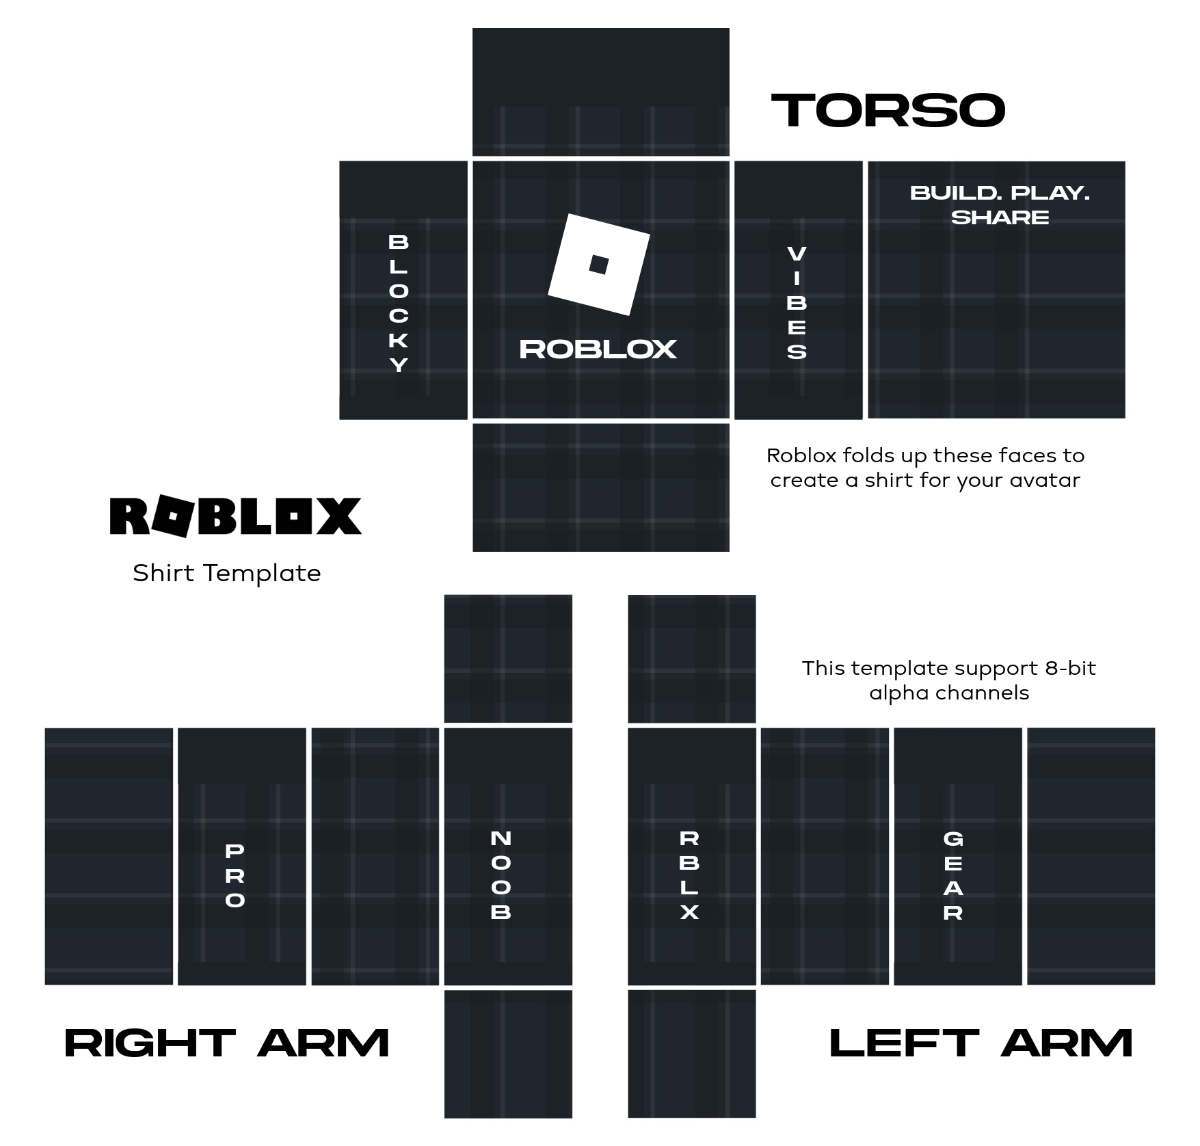
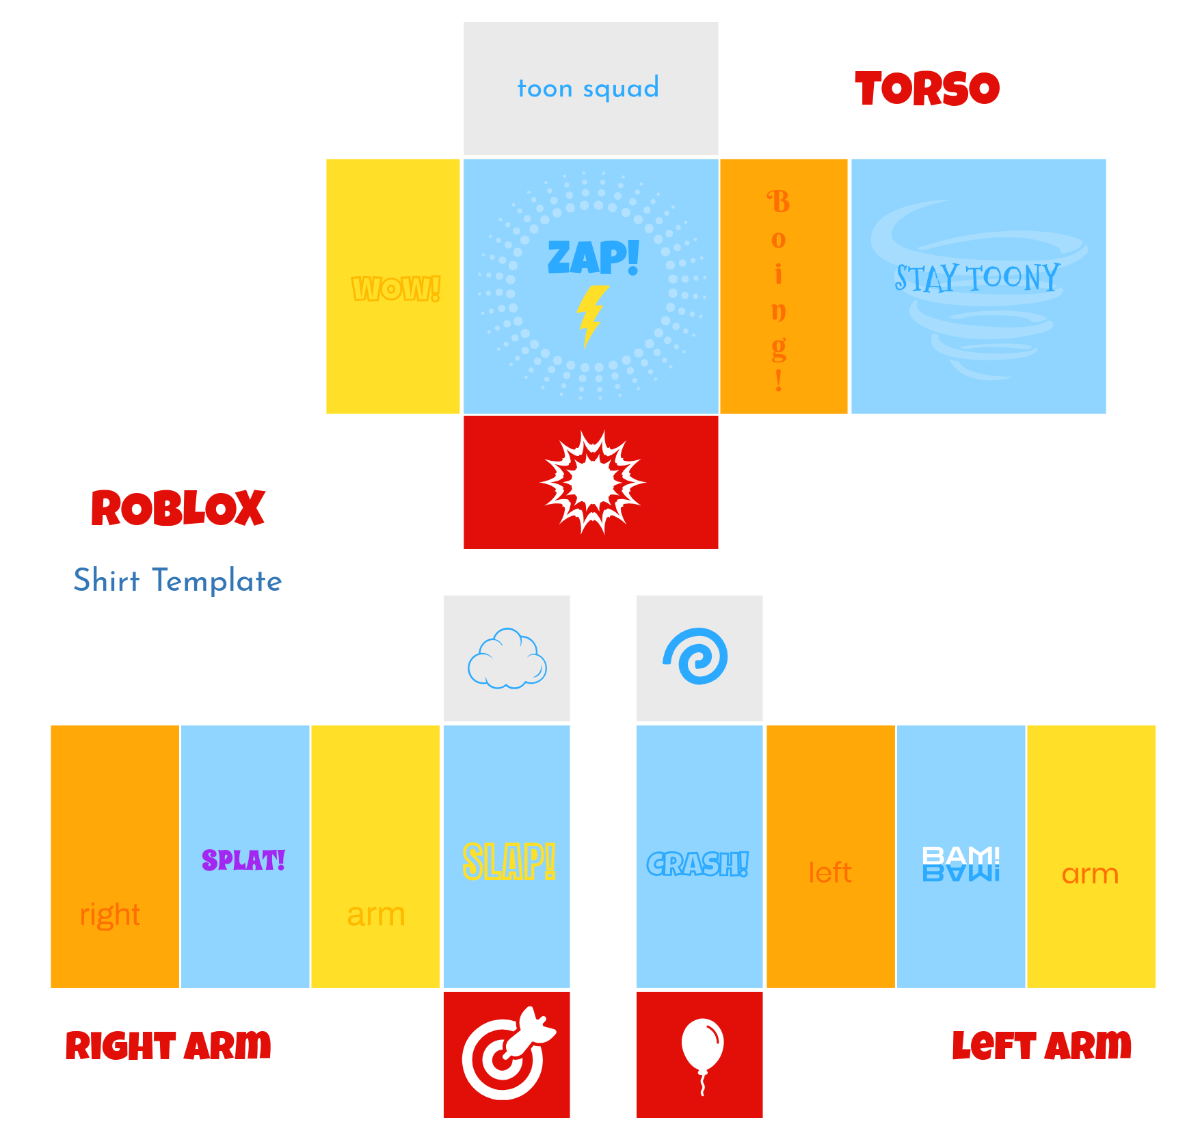
What are the key sections of the Roblox shirt layout template?
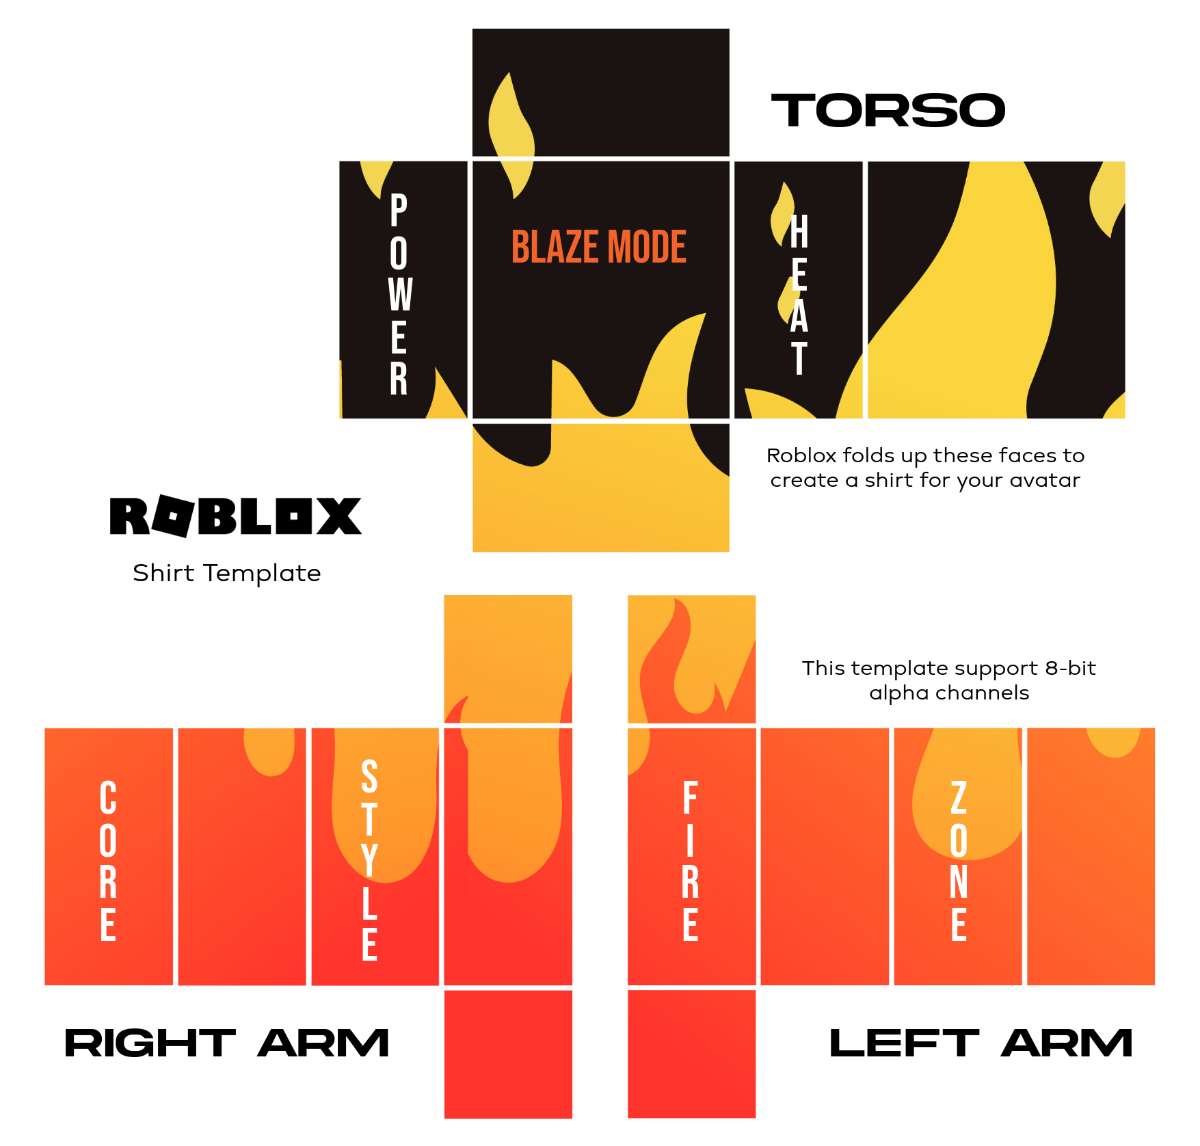
The Roblox shirt layout template is divided into several distinct and crucial sections, each corresponding to a specific part of the avatar's body. These include: the 'Front' (main chest area), 'Back' (spine area), 'Left' and 'Right' sides (connecting the front and back), 'Up' (top of the shoulders/collarbone), and 'Down' (bottom hem). Additionally, there are dedicated areas for the 'Left Arm' and 'Right Arm,' which are further subdivided into 'Outer,' 'Inner,' 'Top,' and 'Bottom' sections for each limb. Understanding which part of your design goes into each of these specific boxes is paramount. Misplacing elements, even slightly, will result in distorted textures when the 2D image is mapped onto the 3D avatar model. Using the template's guidelines as visual anchors for your design elements is key to seamless integration.
What common mistakes should I avoid when designing Roblox shirts?
When creating Roblox shirts, avoiding common pitfalls will save you immense frustration and Robux. A primary mistake is not using the official template or using an outdated/incorrectly sized one, which leads to immediate distortion. Another frequent error is stretching images or text across different sections of the template, resulting in pixelation or disproportionate elements on the avatar. Forgetting about the 'seam' areas, where different template sections meet, often causes visible breaks in continuous designs. Neglecting to test your design on a Roblox avatar before final upload is also a major oversight; what looks good on a 2D canvas might not translate well to a 3D model. Finally, ignoring transparent areas or adding unwanted background colors can ruin the intended look, making the shirt appear as a solid block rather than a layered garment. Always double-check your work and utilize the 'preview' functionality.
How can I optimize my Roblox shirt designs for mobile and different avatar types?
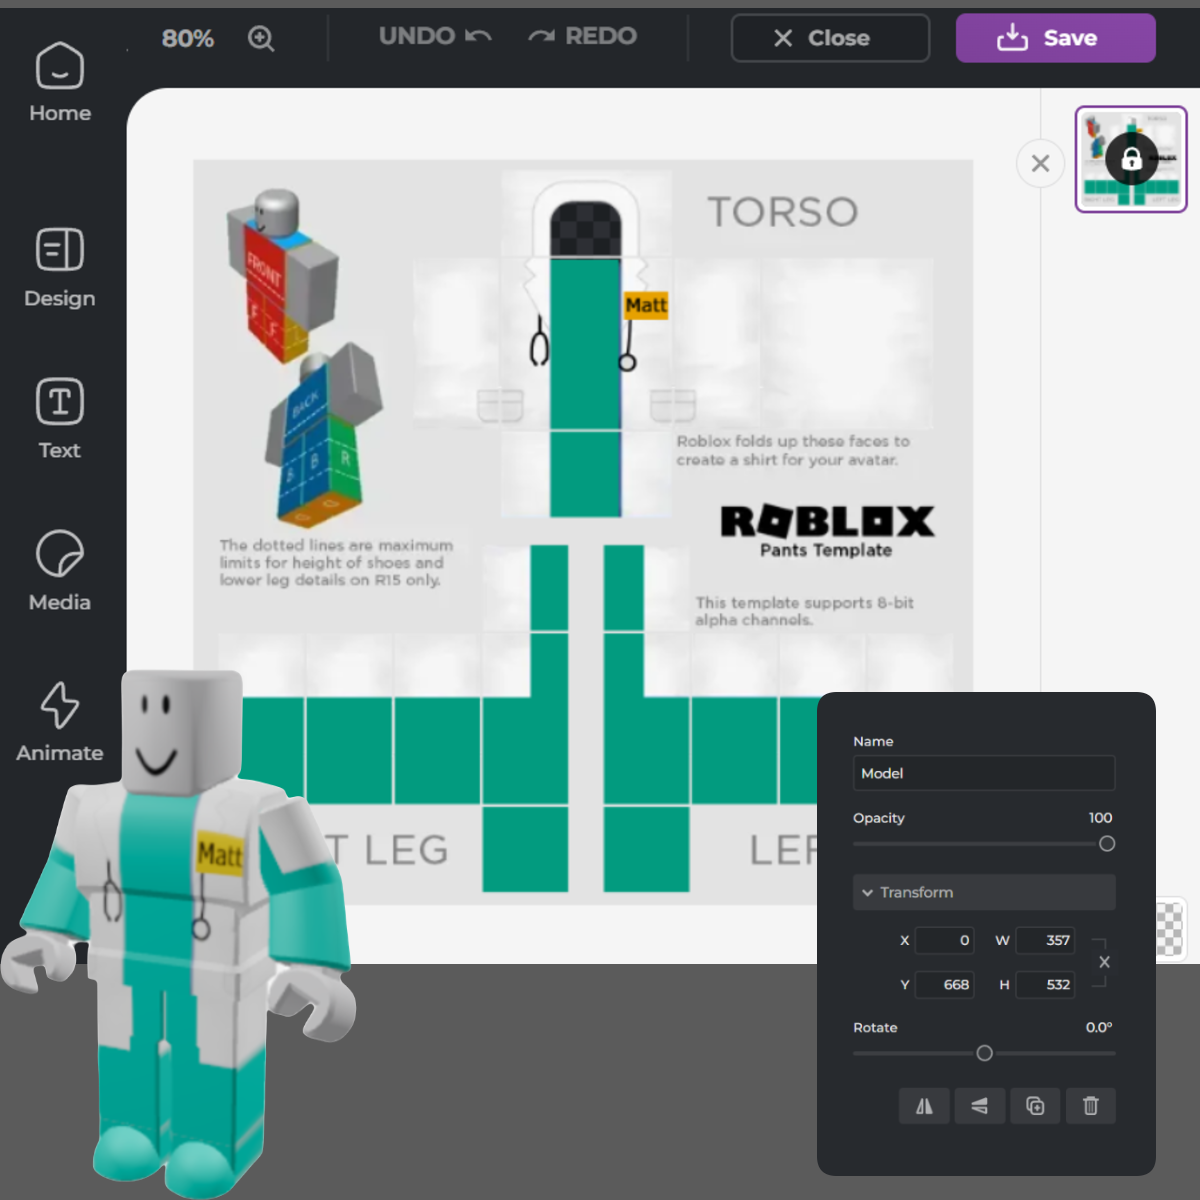
Optimizing Roblox shirt designs for mobile devices and the platform's diverse avatar types is crucial for broad appeal in 2026. The key is to design with flexibility in mind. Firstly, keep primary design elements within the 'safe zones' – areas less prone to stretching or clipping on varied body shapes. Avoid intricate details too close to the edges of the template sections. Secondly, simplify complex patterns and text; busy designs can become muddled on smaller mobile screens. Thirdly, always utilize the Roblox Creator Hub's 'Try On' feature to preview your creation on a standard avatar, and if possible, test it on a few different body types (e.g., Rthro, R15, Blocky) to identify potential issues. Consistent quality across all viewing experiences enhances value and user satisfaction. Consider how your shirt looks in different lighting environments too, as mobile graphics settings can vary.
What design software is best for creating Roblox shirts in 2026?
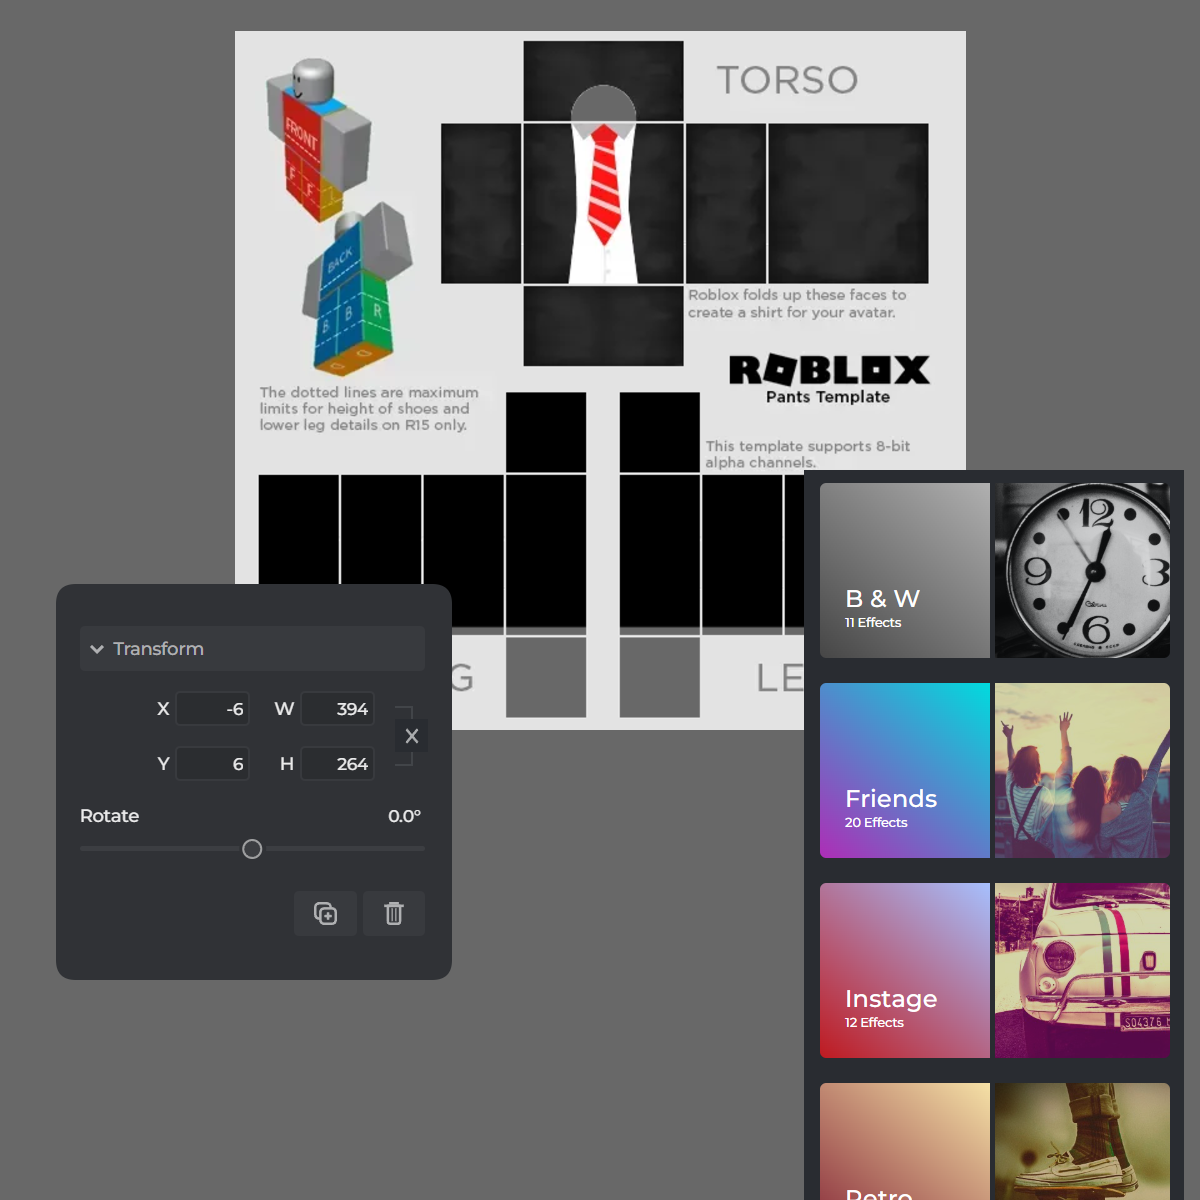
In 2026, several excellent design software options cater to Roblox shirt creators, depending on your skill level and budget. For professional designers seeking robust features, Adobe Photoshop remains the industry standard, offering unparalleled control over layers, effects, and brushes. A strong free alternative is GIMP (GNU Image Manipulation Program), which provides a comprehensive suite of tools that can rival Photoshop for most Roblox design tasks. For those who prefer browser-based convenience or are on a tighter budget, Photopea is an incredibly powerful online editor that mimics Photoshop's interface and functionality. iPad users often find Procreate a fantastic choice for its intuitive touch interface and powerful brush engine. Ultimately, the 'best' software is the one you are most comfortable and efficient with, allowing you to manipulate the Roblox shirt layout template with precision and creativity.
Can I add special effects or realistic textures to my Roblox shirt designs?
Absolutely! In 2026, Roblox's rendering capabilities have advanced significantly, allowing for more sophisticated effects and realistic textures on avatar clothing. Beyond basic colors and patterns, you can incorporate shading and highlights to create depth and a sense of three-dimensionality, making a flat texture appear to have wrinkles, folds, or contours. Gradient effects can add visual interest and realism. While Roblox doesn't fully support advanced PBR (Physically Based Rendering) maps like normal or roughness maps directly for classic clothing templates in the same way it does for meshes, skilled designers can mimic these effects by baking details into the diffuse texture itself. Experiment with transparent elements for layered looks or specific cut-outs. Mastering these techniques requires careful planning on the 2D layout and precise execution in your design software to achieve a truly professional and eye-catching garment in the metaverse.
How do I upload my finished shirt design to Roblox?
Uploading your meticulously crafted shirt design to Roblox involves a few straightforward steps within the Creator Hub. First, ensure your design is saved in the correct format, typically PNG, with a transparent background if necessary, and adheres to the 585x559 pixel dimension. Next, navigate to the Roblox Creator Hub, log in, and select 'Creations.' From there, choose 'Avatar Items' and then 'Shirts.' You will see an option to 'Upload Asset.' Click this, then browse to select your PNG image file. You'll be prompted to give your shirt a name and description. There's also a Robux fee to upload the shirt, which helps moderate content. After paying the fee, your shirt will be submitted for moderation by Roblox. Once approved, it will be available for sale on the platform, allowing players to purchase and wear your unique creation.
What are some advanced tips for professional Roblox shirt creation?
For those aiming for top-tier Roblox shirt creation, consider these advanced tips. Firstly, master layering in your design software; using multiple layers for colors, shadows, highlights, and details provides unparalleled control and flexibility for edits. Secondly, experiment with transparency and blending modes to create intricate, realistic effects or unique overlays that interact with the avatar's base colors. Thirdly, pay close attention to seamless repetition for patterns that wrap around the avatar – utilize tiling techniques for consistent textures. Fourth, actively engage with the Roblox developer forums and creator communities; feedback from peers can highlight overlooked issues or inspire new techniques. Fifth, keep an eye on real-world fashion trends and translate them creatively to the Roblox aesthetic. Finally, continuously update your skills with new software features and stay informed about Roblox's platform updates in 2026 to leverage any new creator tools or rendering capabilities as soon as they drop.
How can I stay updated on Roblox design trends and best practices in 2026?
Staying ahead in the fast-paced world of Roblox digital fashion in 2026 requires continuous learning and engagement. The primary resource is the official Roblox Developer Forum, a treasure trove of information, announcements, and community discussions about new features, updates, and best practices. Follow popular Roblox content creators and fashion groups on social media platforms like X (formerly Twitter), TikTok, and YouTube, as they often showcase trending styles and design tutorials. Participate in Roblox creative challenges or design contests; these not only offer exposure but also provide insights into current aesthetic demands. Keep an eye on external digital art and design communities for broader inspiration that can be adapted to Roblox. Regularly checking the Roblox Creator Hub for news and updates will also ensure you're aware of any changes to policies, templates, or new tools that can impact your workflow and design opportunities. By staying connected, you'll be making smart decisions about your creative direction and maximizing your earnings potential.
As a seasoned PC gamer and digital creator, I've seen firsthand how crucial precise design and optimization are for success, both in virtual worlds and beyond. Mastering the Roblox shirt layout isn't just a technical skill; it's a gateway to expressing your creativity and connecting with a massive global audience. By applying these strategies, you're not just making shirts; you're building a brand and making smart, informed decisions that will pay off in the ever-evolving Roblox metaverse. Happy designing!
Mastering the Roblox shirt layout template is essential for digital fashion creators in 2026. Understanding dimensions, safe zones, and overlay usage ensures professional design quality. Key tips include utilizing official templates, planning designs meticulously, and testing on different Roblox avatars for optimal appearance. Advanced techniques like shading and texture mapping enhance visual appeal, while staying updated on Roblox's creator tools is vital for maximizing design potential and sales within the metaverse.
35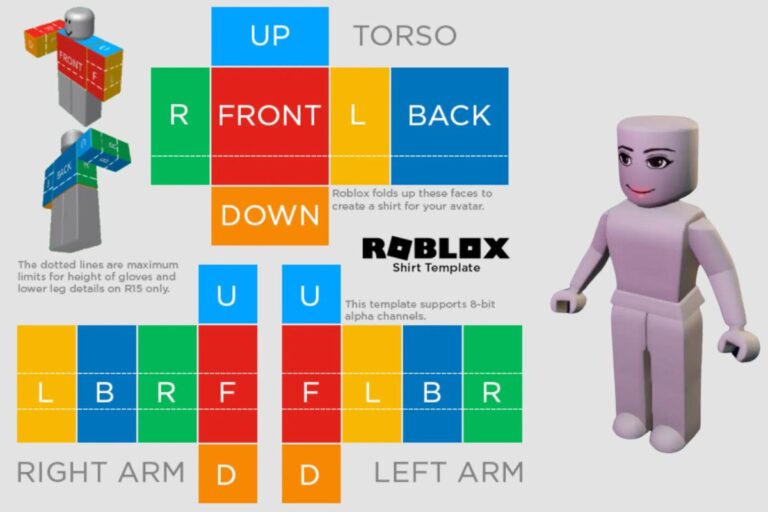


Roblox Shirt Template Your Guide To Custom Apparel Design A Roblox T Shirt Design Template Shown In The Image 768x512 . Unlocking The Y Shirt On Roblox What Makes It Trendy In 2026 Cool Roblox Shirt Template Edit Online . Free Roblox Shirt Templates To Edit Online Hoodie Roblox Shirt Template Edit Online . Classic Roblox Apparel What Are Old Roblox Shirts Roblox Classic Shirt Template Edit Online . Free Cute Roblox Shirt Template To Edit Online Transparent Roblox Shirt Template Edit Online


What Is The Buzz About Eye Shirt Roblox For 2026 Squid Game Roblox Shirt Template Edit Online . How Do I Make Clothes On Roblox In 2026 5. Customizing The Template With A Graphic Design. Roblox Shirt Template Design Unique Avatars Navigating Design. Free Roblox Shirt Templates Fanny Printable How To Make Roblox. Free Roblox Shirt Templates To Edit Online Cartoon Roblox Shirt Design Template Edit Online


Free Roblox Shirt Y2k Design Template To Edit Online Simple Camouflage Roblox Shirt Template Edit Online . Advanced Shirt Template Community Resources Developer Forum Roblox . How Do You Make Shirts In Roblox 2026 Roblox Shirt Templates How To Create Roblox Shirts And Pants.webp. M U O Roblox H Ng D N T Y Ch Nh Avatar How To Get Roblox Shirt Template 4 . Free Roblox Shirt Templates To Edit Online Roblox Colorful Shirt For Kids Template Edit Online


How Do I Make Clothes On Roblox In 2026 . What Is The Roblox Dirty Shirt Trend Impact Red Pattern Roblox Shirt Template Edit Online . Classic Roblox Apparel What Are Old Roblox Shirts I Love Roblox Shirt Template Edit Online . 97 Best Roblox Shirt Ideas Roblox Shirt Roblox Create Shirts . Roblox T Shirt Template


Free Roblox Classic Shirt Template To Edit Online Blank Roblox Shirt Template For Teens Edit Online . Roblox Shirt Template Generator Achieving High Quality Output . Want To Create Roblox Clothing Unlock Your Style Now Roblox Clothing Design Templates Shirt Download . Roblox Shirt . Roblox Shirt Look Roblox Shirt Design Template GTYDB


What Are Asset Templates For Roblox Creators Pink Roblox Shirt Template Edit Online . How Do I Make Clothes On Roblox In 2026 Roblox Clothing Templates Shirt Download Design . Shirt Template Roblox Design . Roblox Shirt Template Clothing Custom Transparent PNG Roblox Shirt Template Transparent Image 220x220 . Free Roblox Shirt Templates To Edit Online Editable Roblox Ghost Shirt Template Edit Online


Pin De Thuy Mj En 3 En 2025 Trajes De Emo Plantilla Para Dise O De . How To Shirt In Roblox H Ng D N T O O Trong Roblox D D Ng Roblox Shirt Template . Roblox Cool Shirt Templates At Blog Cool Roblox Shirt Template PNG Image . Roblox T Shirt Template Free Totally Free Printables Screen Shot 2022 12 13 At 12.38.31 PM . Roblox Shirt Template Football